Showing posts with label math workshop. Show all posts

Sunday, August 16, 2015

10 Ways to Transform Elementary Math


1. Respond to videos - Record yourself and then have the students watch the video during this rotation and respond accordingly. (i.e. in their notebooks, by making a poster, responding in some other way.)


2. Student blogging - Have a prompt ready for students and then ask them to blog a response. They can even respond to others in this system. Free online tools like www.kidblog.org work well for this purpose.


3. Digital Creation - Have students use Google Apps for Education to create a math alphabet book (Sheets would be great for this as each letter could be its own page and students can even work collaboratively on one document!)

4.  Student Created Video - Have students write a creative script 
that includes various math talk vocabulary and concepts and 
then work on recording this video. Several different genres can 
be included here - students could give a news report, create a 
fiction story, or make a documentary.


5. Augmented Reality - Use an AR app, such as Aurasma, with an 
iPad to make student work come to life!

6.  Surveys and Quizzes - Have students use Google Forms or a 
site such as www.kahoot.com to create a quiz for others to take.


7.   Online Portfolio - Have students create a website that will 
house their math progress throughout the school year. There could be a tab for each domain and students could add reflections, graphs, pictures, etc. to show their growth. 

8.  Learning to Code - There are many free sites, such as www.code.org, which guide students in learning how to code. 

9.   Create a math book - Use a site, such as www.storybird.comto create an authentic picture book that has a math theme. Students can even respond to each other’s book within the class or they can choose to share their work with the  world.

10. Connect with Twitter - Have your class participate in the weekly math #mtbos challenge! 
          See https://exploremtbos.wordpress.com/ for details.

Monday, February 2, 2015

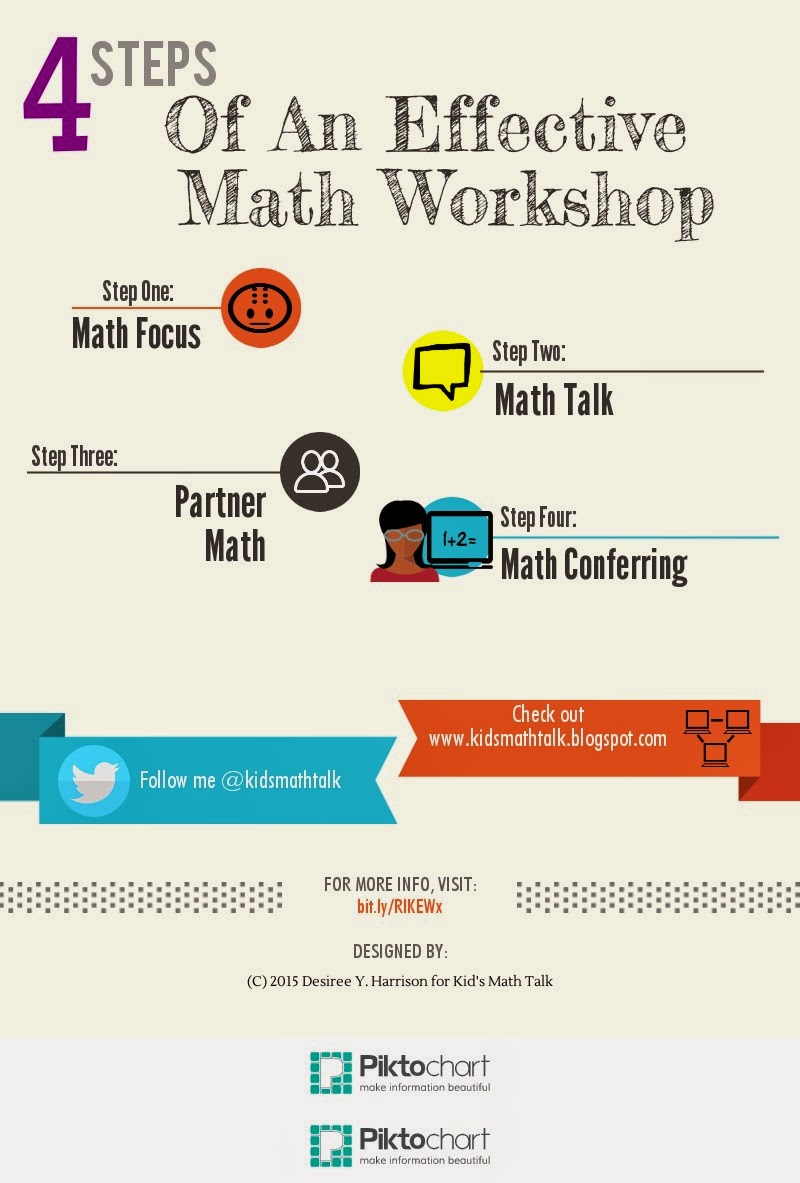
Creating Infographics


Visual representations of information are almost always easier and faster to digest, but did you know you can create what we commonly refer to as infographics, quickly and easily for *FREE* with www.picktochart.com?

If you've never heard of this, I recommend checking it out soon as it will change your teaching world! 

I have wondered for months how so many Tweeters have such quick access to so many lively and professional looking infographics and the only answer I ever received was that they were already on their phones.  So this made me think that in order to really create these visual models one would have to buy some expensive software and then download it their device. But then I found this amazing website... 


Piktochart is incredibly user-friendly. There are many icons and photographs to import into your chart, lines and shapes, various fonts, and even templates to alter so you don't have to start with a blank slate every time. And if you are really feeling ambitious, trying uploading your own pictures to use. 

 In about 10 minutes I learned to use the website well enough in order to create these infographics about my teaching passion, math.


 I was impressed with the results and am looking foward to marking more! I see so many possibilities with this website for the educational world, both in creating easy to read infographics for teachers and for students. 

Here is an awesome video to make your Picktochart experience even easier:


Once you have created an infographic with the free version either:

1. Download as a picture file 
  or
2. Share via Twitter, Pinterest, Evernote, or Facebook


I forsee this technology helping teachers break info into "digestible chunks" of visual info. 


Possibilities for infographics:
-Quick reminders for parents (increase communication)
-Wrap up of a unit of study
-Break down of a process in math and science
-Explanation of a life cycle
- Model for a poster that students will create
-Model of how to make a comparison diagram
-Formative assessment for students about a character, concept, task (requires email account)


What info will you Piktochart?

Sunday, December 7, 2014

Creating a Strong Math Culture-Understanding Perceptions

Creating a Strong Math Culture 
- Understanding Perceptions -
A student drawing about Math Workshop.

Perception is everything. So, how do your students perceive math in the classroom? Do students really feel like the work was too easy? Too difficult or abstract? Am I talking too much with them just listening? 

I feel that it is important to continually reflect on these questions in order to create a strong math culture, but if these answers are only coming from the teacher's point of view, it doesn't really matter much. We are in the field of education to empower and enrich students, and how they are perceiving lessons, units, and classes is what matters the most--if the perception is negative, they will be less likely to engage in and retain the information. So, before diving fully into a unit on Base Ten, I decided to have my students draw a picture entitled "My math workshop". The only directions I gave before passing out the blank paper were that students were to draw whatever came to their minds when thinking of math workshop, and that they had to draw themselves in the picture. 

I was a little nervous to see what some students would draw--would they draw themselves with smiley or sad faces? Would there be lots of colors to make a bright impression? Would they have others in the picture or does the perception of math involve isolation? I love math and teaching and was secretly hoping during the activity that everyone in the class would illustrate that same love.


 This student recalls using the "Fast Nines" strategy while adding.
The final results were really eye-opening! Many students drew themselves with suns shining in the background and smiling faces;one even had a lovely beach scene for math workshop. I wish we really could have math workshop while out in the sunshine! Another student drew themselves using different strategies with their "bff" and yet another student had themselves with Base Ten unit manipulatives while someone else in the background was laying down snoring. Not sure what that part was all about, but overall everything was invaluable feedback!  


This student focused on using the online program www.xtramath.org
This student drew himself adding with apples.

One item that was not present in most of the pictures was our math talk word wall. I'm not sure why because we recite these words everyday, so I plan on having a conversation with my students about this absence.  I also plan on repeating this activity with each new unit to see how perceptions are changing and evolving.

Happy to see that this student loves math operations!

Kid's Math Talk Tip
In order to see if there is truly a disconnection between the teacher's point of view and that of the student's, it helps for the teacher to also engage in this exercise before giving the assignment to students. This is extremely powerful--seeing is believing, but sometimes what we as adults see is completely different from what our students perceive. Just make sure that you wait until AFTER students draw their own versions to show them how you view math workshop.


Invite your students to create a "My Math Workshop" drawing this week!

Thursday, April 17, 2014

Fractions of a circle

How can I represent a fraction with a picture?

Our math focus question for day 2 ended up being quite simple for my students to answer. That energized me and allowed me to alter the lesson on the spot and add a few challenges to the circle geoboard lesson, like finding and representing 1/12 of a circle.

I thought that students would have the most difficult time creating 1/3 of a circle, but I was pleasantly surprised when this came easily to the majority of the groups.  Getting students to use the Geoboard before simply drawing out the different fractions proved to be the largest problem. Oh the math practices and the heartache that can sometimes come with them!

Students had easy transitions into their groups and partnerships today, which was wonderful to hear and see. I have a voice level chart in my room anyway, which helps to monitor such events in the classroom.  I think that the numbering around the room is also helping in these transitions. Label everything you can to make math workshop run smoothly!


Partner Math Parallel Questions
How do you know that 1/2 is larger than 1/3?
How do you know that 1/2 is larger than 1/4?
How do you know that one whole is larger than 1/2?


Take Aways from Day 2
One aha! moment for me was actually during the independent math portion of the workshop. At least 3 different students let me know that they had forgotten what each comparing symbols meant (<,>).  Yikes!  I need to print off Comparing Symbols bookmarks for my students so that those symbols are easily remembered.


            Re-engagement for whole fractions
Yesterday I had three students that circled either 1/3 or 2/3 to represent one whole, which obviously concerned me.  So today during our independent math portion of class I invited them to my work table to talk about this concept. Turns out that one of these students knows an infinite amount of fractions that equal one...so I am thinking that he just rushed through the problem because it was the end of class. That's another issue to tackle, but I'm happy to know that his answer was not because of a misunderstanding.

The other two students who circled fractions besides the whole took a little longer to come around and I am only convinced that one of them now understands and would be able to recognize fractions that represent the number one independently. 

I wrote a variety of fractions on their white boards and asked them to circle the fraction that meant the same as one whole. Both were able to complete this task with success, but only one was able to create different examples of fractions that equal one whole.   

I will provide another re-engagement the next time we meet, but this time it will be with some different manipulatives...maybe some of that lovely Dollar Tree clay I found last week! 


Loving this math unit but we have an assembly tomorrow, which means no math...no school Friday...I have a meeting on Monday...

So no math until next Tuesday?? What am I going to do with myself...sigh.


Tuesday, April 15, 2014

Yummy Fractions!

So I started my fractions unit today by being a true risk-taker. And I'm so glad I was! We had fun with fractions while making Trail-Mix....Yum!

Pulling this off with 30 students took some planning and thinking about the proper set-up, but it was so worth it! I have five groups in my math workshops, but further dividing them into partnerships A,B,C, was a great plan. Since this was the first day of the new unit, the students belonging to partnership A were the captains. This proved to be clear for the students and quick for me when passing out materials. (Click here for more info about my math workshop organization.)
-----------------------------------------------------------------


I used some basic trail mix ingredients (minus the peanuts) for this intro fraction activity:

- One box of honey nut toasted oats cereal

-3 bags of mini-marshmallows

-one container of raisins

-one bag of mini-pretzels (that I crushed up even more)

-two bags mini semi-sweet chocolate chip pieces

The quantity you need will vary depending on how many students you have in your classroom and on how much of the mix you would like for your students to take home. 

We ended up with 1/2 cup of trail mix for each student, which I thought was just enough for them to enjoy while remembering that the true purpose of the trail mix was to think about and work with fractions.
-----------------------------------------------------------------          The Math Workshop Parts for Day 1


Math Talk
As students enter the room, they are to head to the "Math Talk" tray to grab the warm-up for the day. I used a simple and quick fractions worksheet to get brains flowing while not taking up too much precious time from the main activity.

Mini-Lesson
I started the mini-lesson with an anticipatory set. I had already asked students to wash their hands before entering the room (we had recess directly before this lesson) and they used that fact as a clue to help them infer what I was hiding inside my box. I also had some clues around the box (measuring cups and large zip-top bags) to help with the inferring. Look at that...math and reading strategies together in harmony.

Once I gave students a minute to talk about the clues with their partners, the work began. I passed out the jumbo zip-top bags and measuring cups to groups and then asked students "what do you notice?" about the measuring cups themselves.

Thinking quickly moved toward the fractions on the handles of the measuring cups (yes!) and then a student mentioned cooking...then the excited whispers started..."Food is in the box!"

Once students made the connections, I opened the box to reveal the zip-top bags filled with the ingredients for making the trail-mix.

Teaching Point: "Today I want to teach you that we can use fractions in everyday life. I also want you to think about how many ways we can represent one whole today."

Partner Math
The mini-lesson and the partner math then meshed together, as the class stayed whole group on the carpet while creating their trail mix with their groups. Each person had a turn scooping out a certain fraction of an ingredient to add to the trail mix bag. I altered the portions so that in total we had about three cups of food in the trail mix bag. When trying this with your own class, you might want to play around with the proportions to make sure the total can be divided evenly.

            Possible questions to pose during the activity:

"How do you know that you have more/less of _______ than _______.?"

"If we add 1/4 of a cup to the bag, how many total cups will we have?"

"If we need a total of 1/2 of a cup of pretzels, how many times should we scoop using the 1/4 measuring cup?"


Before each scoop, we talked about the fraction and if that fraction was less than, equal to, or greater than 1/2 of a cup.


Summary of Learning
At the end of the mixing, students had to figure out how much each person could scoop to make sure that they were being fair with the mix. 

I first proposed dividing the contents of the bag in half so that two out of the six students could take home trail mix, which was quickly shot down..."That's not fair!" one student protested, "unless I'm getting one of the halves!" She joked. Ahhh, I love when students forget that they are doing math and just decide to be present in the moment!

With students knowing that simply taking 1/2 of the bag would not be fair to everyone, I shifted the conversation into thoughts about what fraction would be fair.

I was blown away by how quickly students grasped the concept of using the measuring cups to be precise about their fairness...which then led to the discussion of precision of language...which cup? why? 


We soon found the correct language and vocabulary and students were using the 1/2 of a cup to make sure that the divisions were fair. Students then began scooping our their share into smaller zip-top bags for them to keep. Students were engaged the whole time and excited to see the connections that can be made between food and fractions. This real-world application really worked well!

Independent Math
In math workshop, I usually have the independent math portion come before the summary of learning, but the layout of this lesson did not lend itself to that tradition very well. I had another type of exit slip already planned for students, but due to how the lesson played out and time constraints, I simply used the Little Baker's Recipe Card as student's independent math.

                            I used the Little Baker sheet below as an exit slip...
                              Click on the picture for a free download!

Students simply filled out the questions and I paid close attention to which fraction was circled as I stapled this sheet onto their plastic bags. Out of 30, there were 3 that had something other than 3/3 circled...I will be meeting with them in a small group tomorrow to reinforce whole fractions!

Saturday, April 12, 2014

Math Workshop Organization

How are you organizing math workshop in your classroom?  I have had many deep thinking sessions on how to best organize my classroom for math workshop.  After many trials and errors, I feel like I finally have a good handle on what teachers and students need during this valuable workshop time.


Part One - Sturdy, labeled bins


The Details:
Little mathematicians need to know where they can gain access to the needed tools for success! Each group of students for my math workshop has two labeled bins for general items on the top shelf (things like foam dice, laminated open number lines, crayons, glue sticks, counters, dry erase markers), and then labeled bins for speciality items that are used depending on what the focus is for the lesson. There is no more arguing over who gets which materials...everything is labeled! This allows for students to get to work right away and to keep things tidy.


The large numbered bins on the upper right hand shelf are for the different partner options that are available during our math workshop. Students know to come to one of these bins when they are finished with the required work for that day and the independent math portion of workshop has not started.


Where to buy:
Before you buy anything, do yourself a favor and look through your cabinets...think about repurposing!  I have collected many of these clear plastic shoe boxes throughout my years of teaching and repurposed them for math workshop! For others I waited around until there were deals on Amazon, like the very durable Sterilite deep clip boxes. I also have repurposed picnic utensil baskets from the Dollar store to hold every day items that students might need.


The Dollar Store will become your best friend once you make the leap to math workshop!


**Inside each bin I have placed materials for three separate partnerships. This will vary depending on how many students are in your class.**


I have the following labels and materials for the specialty bins:

Base Ten Supplies Bins


Unifix Cubes
I decided to color-code the unifix cubes just to make it a little easier for clean up. Depending on the age group of your students, you might want to consider using two different colors so that it is easier to have rich discussions about addition and subtraction within ten.

Centimeter Cubes
I debated placing the centimeter cubes in the measurement bin instead, but kept them here with the base ten supplies because the majority of the lessons for base ten that go with our curriculum call for the use of these pieces.

Place Value Strips
The place value strips came with the curriculum mandated by our district. They are especially helpful with thinking about and working with the hundreds grid.

Other possible items for The Base Ten Supply Bins: two-sided counters, hundreds grids, "flats" for Base Ten (I often use geoboards to substitute for flats because they are easier to pick up from the floor.)


Fraction and Money Supplies Bins


Fraction Dice
These make for a fun alternative to foam dice when dealing with fractions. Roll a random fraction to think about equivalency, building, or drawing.  Another option is to roll two together to involve the operations with fractions!

Measuring Cups and Spoons
Bring cooking into the classroom! Have students analyze, talk about, and create with these measurement tools. I also bring these out when dealing with measurement and data activities. Everything connects!  I found these beauties at the Dollar Tree!  What a find!

Circle Fraction Pieces
These are crucial when introducing students to the idea of comparing fractions and can work as a great visual when talking about adding unit fractions to make a whole.

Money Kits
Encourage correct use and talk around money with money kits. These were super simple to put together and are just inside a zip-top plastic bag. I do have a list of the contents taped to the bag for accountability. I have included plenty of play (but real life-like) dimes, quarters, nickels, pennies. I also have mini-paper versions of paper bills. Students love!


Measurement and Data Supplies Bins


Clocks
Students often have trouble first understanding that time is a unit of measure. Make sure to place some hand held analog clocks in this bin for elapsed time and telling time work.

Thermometers
These are simply printed on card stock and then laminated. that way students can use dry-erase markers on them for practice and formative assessments. Make sure to get the kind that are both Celsius and Fahrenheit. 

Calculators
I personally do not use these very much in the classroom...I always tell students that the calculator is their brain! But there are some neat pattern activities that can use the calculator. It is important for students to see the calculator as another tool to help them check the answer; it is not a crutch or an alternative for thinking.

Rulers and Measuring Tape
These are the essential items for measurement...make sure to have both inches and centimeters available for student use.


 Part Two - Clear labels for math workshop  
 parts


I have two large word wall displays in my room for math workshop. The first is specifically to house what students will do during each part of the workshop. I made some really cute identification cards to separate the different parts of my workshop. I also have numbers for the options so students can easily match everything in the room. I made simple cards with Group numbers on them to identify which group I will meet with during the independent portion of the workshop. Again, I can't stress enough how important it is to label everything for clarity! 

Click on the pictures below for link to one of my TeachersPayTeachers products that includes these headers!


The second chart is specifically for the "Math Talk" vocabulary words that will be emphasized during the week. Each row is numbered so that it is easier for students to find the word(s) we are talking about.  I simply cut yellow construction paper into strips so that I could write and draw larger versions of vocabulary words. This makes it easy to see no matter where you are in the room.


Part Three - Clearly Visible groups and  partnerships

Before the beginning of each unit, I sit down and think about partnerships. Several factors come into consideration including:

1. How well a student performed on the pre-test 

2. Who a student has worked well with for partnerships in the past

3. Overall student strengths with the Number and Operations Common Core Standards 
      (We are tracking this progress throughout the school year with this freebie!)

4. A student's work ethic

5. A student's development and understanding of the eight math practices

I know that in some teacher versions of math workshop, students are placed in somewhat homogeneous groups based solely on a pre-test, but also valuing the factors mentioned above has made for very interesting and productive groups in my classroom.

I also feel like every student can contribute to another's learning, and thus my groups often end up being heterogeneous.  


Group Posters

Having the partnerships and groups clearly visible in the room eliminates confusion for students and allows for easier and faster transitions. Subs will also thank you for having these lists so easily accessible! My lists are hanging right next to the Math Workshop board.  

I also have a numbered student roster next to the list of partnerships so there is no confusion on this. I have students put their number on everything so that their papers are easily filed and returned.


Since each partnership also belongs to a larger group of students, I have pre-determined teams for whole class reviews and for re-grouping when one or two students are out of the classroom. This also allows for a group of 4-6 students to meet at one designated spot in the room and share a group bin. I still meet with at least one group as a whole each day and find that I can still differentiate while meeting with each group of 4-6 students.


    Part Four - Designated meeting space


Students always gathered close to a screen for the math talk and mini-lesson portions of each day's workshop, but now that I have a Smart projector (yay!) my student meeting space is enormous!  

Generally, teachers who teach math workshop should have a place in their classrooms where students gather at the beginning and end of each math workshop session.  While on the carpet, I have students sit knee to knee, elbow to elbow, with their math partner(s). They are also to sit in the same area as their math groups.  The meeting area should be a comfortable place, but also a place where students know there is a mini-lesson to focus on daily.

I made (really my mom and dad...thank you!) some of those adorable crate cushions that were trending on Pinterest a summer or two ago for stadium seating for mini-lessons. I also have it in my classroom where sitting on these cushions is a privilege reserved for students who are truly following direction and are showing patience.


How are you organizing for math workshop?

Welcome to Kid's Math Talk, LLC!

Welcome to Kid's Math Talk, LLC!
My name is Desiree and I am super passionate about math education and best practices for students and their teachers. Thanks for stopping by my blog!

LinkWithin

Related Posts Plugin for WordPress, Blogger...